Showing posts with label play. Show all posts

Sunday, October 19, 2014

fun with rr tracks

- wooden rr tracks
                         - foam paper or construction paper
 - double sided tape

Sunday, April 13, 2014

all ears snack time!

my boys love their veggies, but little rabbits and bears and other creatures love them even more ;)!
 just one piece of construction paper and tape (we used washi tape ;)
optional - coloring the ears or even drawing some eyes on the headband
.....but trust me, even plain, uncolored ears are loads of fun!
 yes, even animals like to play with their food :)!
...a growling bear!!!


Sunday, January 19, 2014

cheerios box dragon wings II

i made a "fancier" pair of wings for St for the upcoming carnival...


same ol' cheerios box only...
attached tail to wings,
glued felt to both sides, 
attached elastic bands 
and
made a pair of ears to go with
(headband, green bias tape, 
felt glued ch. box triangles) 


satisfaction gaurunteed! :)

Saturday, March 17, 2012

carneval balls

made some balls and pillows for the childrens' carneval raffle:

and we had to try them out :)...                  


Friday, November 4, 2011

LOS - legos on a string

Ji is really into making lego planes lately, so we decided to fly them :)


i used my cordless driver with a tiny 0,5mm drill bit
p.s. if you don't have any tiny bits, get some -
they come in handy for small projects like this!


make mobiles, pull toys or just hanging art!


Wednesday, April 13, 2011

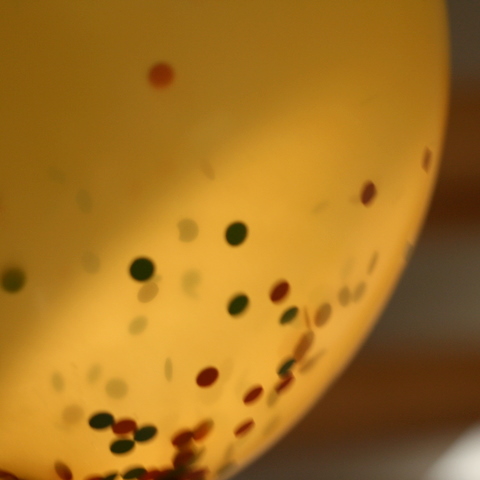
confetti balloon play

what you need: 
- balloon - at least somewhat see-through
- paper
- hole-punch or scissors
- funnel or tube of some sort
- string


- make some confetti - using a hole-punch or just cut up some tiny strips of paper
- insert a funnel or tube into the mouth of your balloon
(i used a thread bobbin tube) and pour your confetti into the balloon
- blow up balloon and tie a string on and tape/tie to your ceiling/ceiling beam
- play time!


both Ji and St had fun with it....well, i did too! Ji and i ping-ponged it to each other which amused St, then St played with it which amused us :) - i put him within hand's reach of the balloon (...he had the most fun, when he was in his bouncer) and he waved his little hands and feet trying to hit it. and when he succeeded he started screeching with joy - it was so cute :)

Thursday, March 31, 2011

mail/garbage carrier

all you need:


recommendation for cutting the box - i find it the best to take apart the glued top/bottom and lay the box flat and cut in one line, instead of having to cut all around and ending up a bit off the start point, and then re-glue the  closure again.

when we finished making the mail-carrier and i attached it to Ji's vehicle(JD tractor, that is way to small for him now, but he still loves it!), he announced that he will be a garbage man instead and that he wants to collect garbage....luckily after we made some pretend mail with our stamps i persuaded him back to the mail man gig!!! garbage...maybe next time ;)

Wednesday, March 23, 2011

fun postage stamps!


fun to play with or use as "additional" postage ;) on your real mail!

all you need is:
- brown paper tape (found at office supply stores)
- stamps and stamp pads
...you can find a great tutorial for making your own stamps here!
- zigzag scissors


Monday, March 14, 2011

paper garland wand

it is REALLY quick and easy to make!!!
takes only 10 minutes and the fun is everlasting!
all you need is:
- plain paper - it "flies" the best!
- scissors
- wand - mine is a wooden craft-stick,
but anything will do - even pencil :)! 
- sewing machine


 - cut paper lengthwise into strips about 4cm wide and have your kids cut them into smaller strips....if they're not all the same width, the better ;)!

- then slowly feed the strips into your sewing machine, leaving gaps between them about 0.5 to 1cm long - Ji and i turned this part into a color game having him find and hand me the color i called out.
- the final length of our garland is 1m, which seems to be the best length - long enough for a nice flying tail but not too long to get tangled!
- tie garland to wand - make a little notch on your wand where you are going to tie your garland on so it doesn't slip.


Saturday, February 26, 2011

mouse house

Ji had been telling me about some imaginary mice that lived under his bed (....yes, they truly were imaginary!), so one night i decided to stitch up some felt ones. it was a fun surprise for him to find them the next day under his bed.....good thing he wasn't disappointed that they weren't real! 
anyways, so they wouldn't get lost all over the place, we made them a little house (Ji applied the glue and did the coloring :):

p.s. your house doesn't have to be for your mice ;), but
 it's much more fun when it's meant for an inhabitant!

                                                           tools:
note - i use the kitchen knife(the dull side)
for making the bending or crease lines


take apart your box, draw the cut and crease lines,
then cut out your house(don't forget the gluing flaps!)
and openings and make bending/crease lines

then glue together and voila!

and have fun coloring, gluing on colored paper, whatever you (...or your mice :) ) like!